The Paper Chain Art Project is such a fun collaborative art lesson for kids of all ages. I have taught this lesson to 2 different age groups and here is how I adapt it for different age groups.
Why Students Love It
Students enjoy working together in teams and with their friends while establishing a sense of community. Working together allows students to learn from each other, share ideas, and build confidence in their artistic abilities. These projects also encourage problem-solving and communication skills, making them a valuable and engaging learning experience. Every time I teach this lesson, my students are always so proud to see the finished product. I think it is very rewarding to see something they worked together to create displayed in our school.
Lesson Objective
The main objective of this lesson is to work collaboratively to create a large mural in a timely manner. However, I also use this lesson to teach my students about pixels, DPI and abstraction. Many students can make real life connections to video games, especially Minecraft. Analyzing Minecraft as an art is a great way to teach abstraction and how to easily abstract an image. In this activity, students learn how to abstract simple images using links of a paper chain.
Who Loves This Lesson?
I have done this with students as young as 4th grade through 8th grade. However, I know high school students would enjoy and benefit from this lesson as well. All students benefit when engaged in projects that allow them to articulate their ideas, listen to others, and negotiate roles and responsibilities within the group. Again, these are 21st century skills that are valuable to students as they prepare to be working adults.
Prepping the Lesson
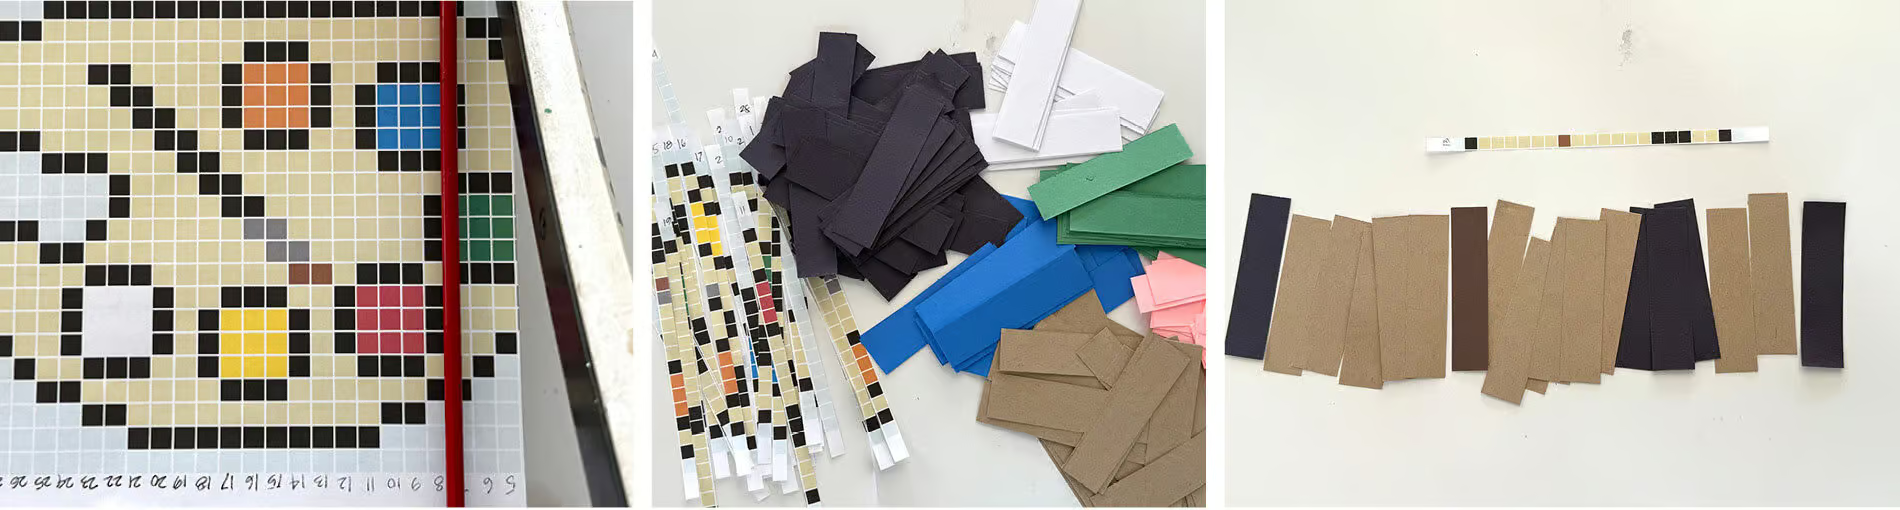
Here is how I prepped the materials for the lesson. After choosing a template, I numbered the top of each row of the pixelated image. I cut the pixelated image into strips with a paper cutter. Next, I cut construction paper to match the colors of the squares. I use 1” x 4” strips of paper to prevent the loops from stretching out, however, it may be easier for younger students to use 1 ½” x 5” strips.
Then I cut the same amount and size of white strips to connect the pieces. Each tray had a strip of the template, colorful strips of paper, white paper and a shallow container of liquid glue. I found it is easier to smear a small amount of glue with a finger rather than use the glue bottle or glue stick. If the group finished the strip, I gave them a new strip of the template to start working on. The trays were always ready for the next class to continue working on.
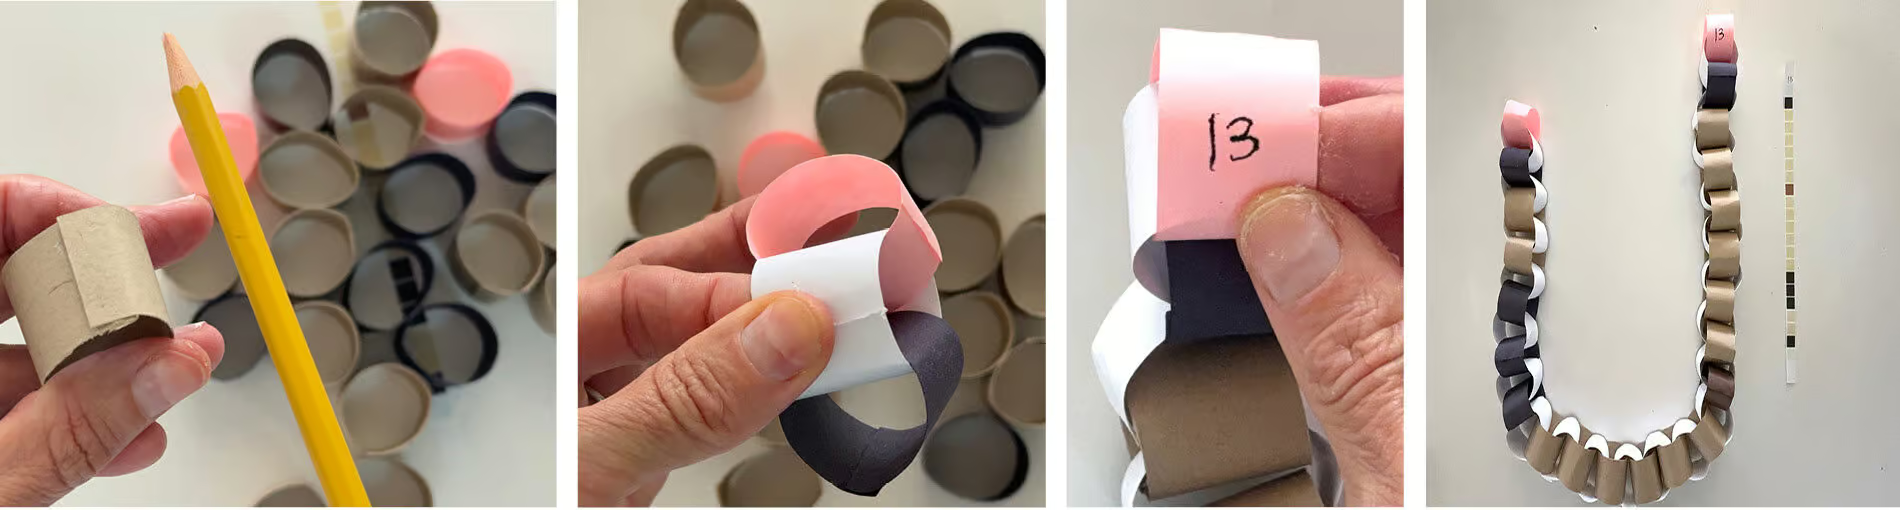
Consistency and communication are key. This is what makes this a great collaborative art lesson. I suggest students literally use a pencil as a guide or measurement when overlapping the ends of the strip. It is important the same amount of paper is being overlapped, and using the visual of a pencil is easy and readily available. Another important factor is making sure the ends of the papers are glued straight and not at an angle. This is why I suggest one or more students make the loops, to keep it consistent. One or two students assemble the loops with white strips. I demonstrate all these tips to my student while projecting images from a PowerPoint.
Lastly, as the group finished a row of chains, I ask the students to write the corresponding number on the top of the chain. Again, this will keep all the chains in the same direction and keep them in the correct order. Students place the chains on a table in chronological order and I use a hot glue gun to glue the rows of chains together as they are working. I tack the white links together to keep the image aligned and make up for longer and shorter loops.
Modifying for Older Students
With older kids (grades 6+), I allowed them to work in groups of 2-4 students. They had the task of designing an image using a blank grid template instead of using a pre-designed tempate. This is where the creativity and problem solving came in. I encouraged them to create a design that was 10 x 10 pixels for each person in the group. For example, a group of 2 may have a design of 10 x 20 pixels, while a group of 4 will have a design of 16 x 26 pixels. These parameters were given so each group would finish their mural approximately at the same time.
Next, they assigned jobs to each of the group members. They decided who would be the manager of the group to keep things consistent class to class and made sure everyone was on-task. Other team members connected the colorful loops with white connectors and other team members assembled the loops. Some of these roles changed, as they realized their strengths and weaknesses very quickly. I made a lot of connections to the work force and completing work in a timely manner, as well as working well with one another and the importance of communication. I wanted them to work together in solving problems and working as a team.
Hanging the Pixel Art
A meter stick or dowel works great to thread through the loops across the top. I use Command hooks and place the stick on the hooks. My students absolutely loved seeing the mural come together the next week and enjoyed seeing it hung in the art room all school year. They begged to make another one!
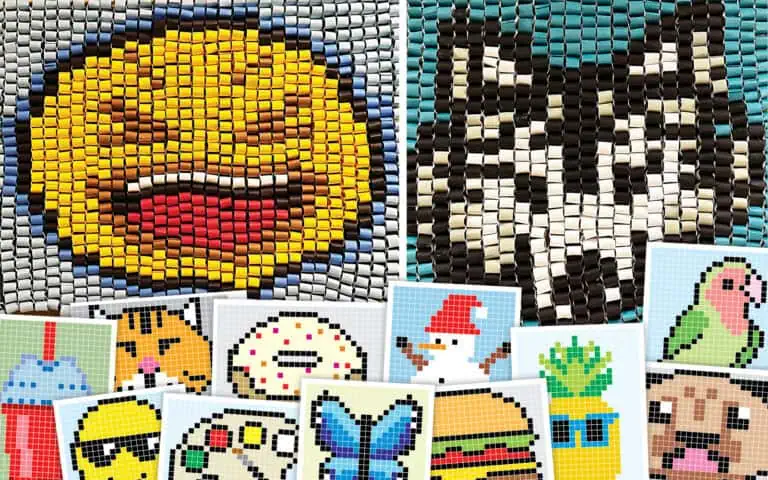
![]() My Paper Chain Pixel Mosaic complete lesson plan including 12 templates is available here.
My Paper Chain Pixel Mosaic complete lesson plan including 12 templates is available here.
Thanks for Reading, Trista
If you liked this Paper Chain Art Project post, please subscribe by clicking here.
Check out my How To Page for more posts like this.
Related: Check out my Collaborative Art Lesson Ideas post for more ideas