Here are a few collaborative art ideas for when your students need a change of pace. For example, after a long lesson or a project that requires a lot of focus and concentration, a collaborative lesson is a perfect reset. They give students a chance to think quickly, be creative, and most of all – collaborate! Not only does collaboration help prepare them for the real world, but these activities end up being some of my students’ favorite lessons.
Paper Chain Mural
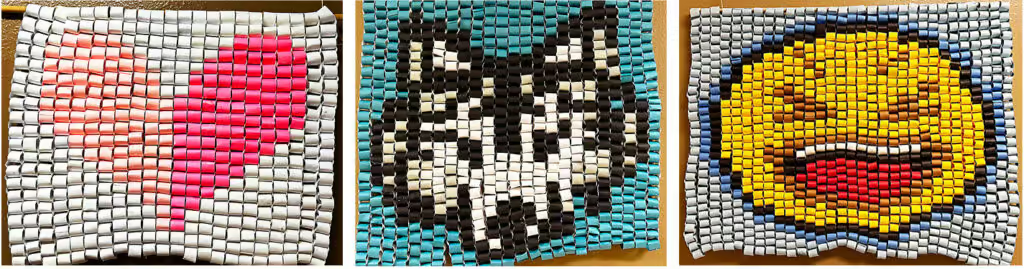
Students will LOVE this Paper Chain collaborative art lesson! It is perfect for older elementary students or middle and high school students and promotes team building. Students learn information about pixels and DPI and then create an image using graph paper. The students then use thin strips of colorful construction paper that correspond with the graphed image to create chain links. The links are assembled with white links to create long chains. The chains are then threaded through a wooden dowel or stick and the chains are hot glued together to create the image. It is a great lesson to teach the importance of collaboration and creating art in a timely manner. It is also a perfect way to make inexpensive murals for your school. My Paper Chain Pixel Art Lesson is available here.
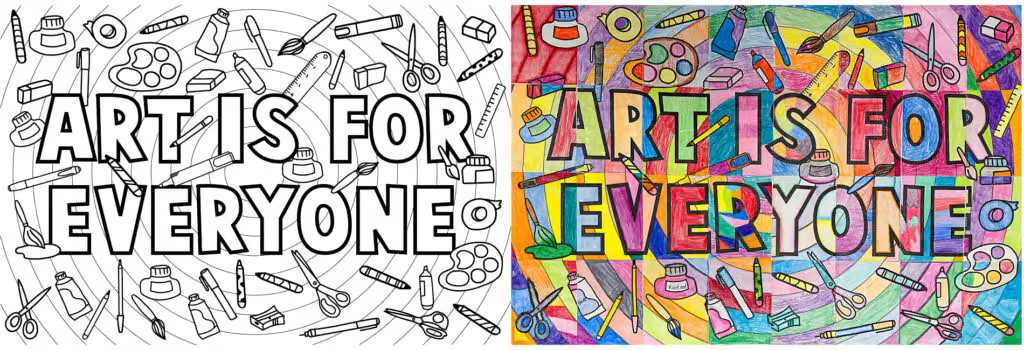
Collaborative Coloring Activity
Another easy activity is a collaborative coloring poster. This can be perfect for Back to School or anytime of the year! Collaborative posters are a great brain break and give students a chance to think quickly, be creative, and most of all – collaborate! I created an image, then made 32 one-page coloring sheets with a small piece of the image. I have my students color 1-2 pages as they wish then trim and glue the pieces together to create one large class mural. Next, I glue all the pieces to a large piece of bulletin board paper and attach the entire mural to a wall or bulletin board. My Collaborative Coloring Posters are available here.
Paint Swap
I like to do this activity after we finish a painting lesson and we have leftover paint. I give each student a piece of tagboard. The students paint a base painting or underpainting. I encourage students to apply in a thin layer so it dries quickly. While it is drying, I explain the directions. They pass there painting to the next student and the that student gets five minutes to add to the painting, but not cover or erase what others have added. I remind them to keep an open mind and not dictate how they want their painting to look in the end. That is the fun part. Provide students with a variety of paint brushes and tools and set a timer every 5 minutes. Once they have swapped 4 times, the original owner gets their turn to add to their painting. This is my favorite of the collaborative art ideas!
Chopped: Art Edition
Students work in table groups for this challenge. Similar to the tv show, I give students a basket of ingredients with materials to create a sculpture (aka. junk found in my art room). I give them a time limit and access to other materials and tools to create their sculptures. Usually, I give them two class periods and in the third class period we announce the winner. I select a winner using the following criteria: originality/creativity, craftsmanship, use of basket ingredients and teamwork/collaboration. My students really enjoy working together and stay very focused because of the time limit. The energy and excitement is high with this activity.
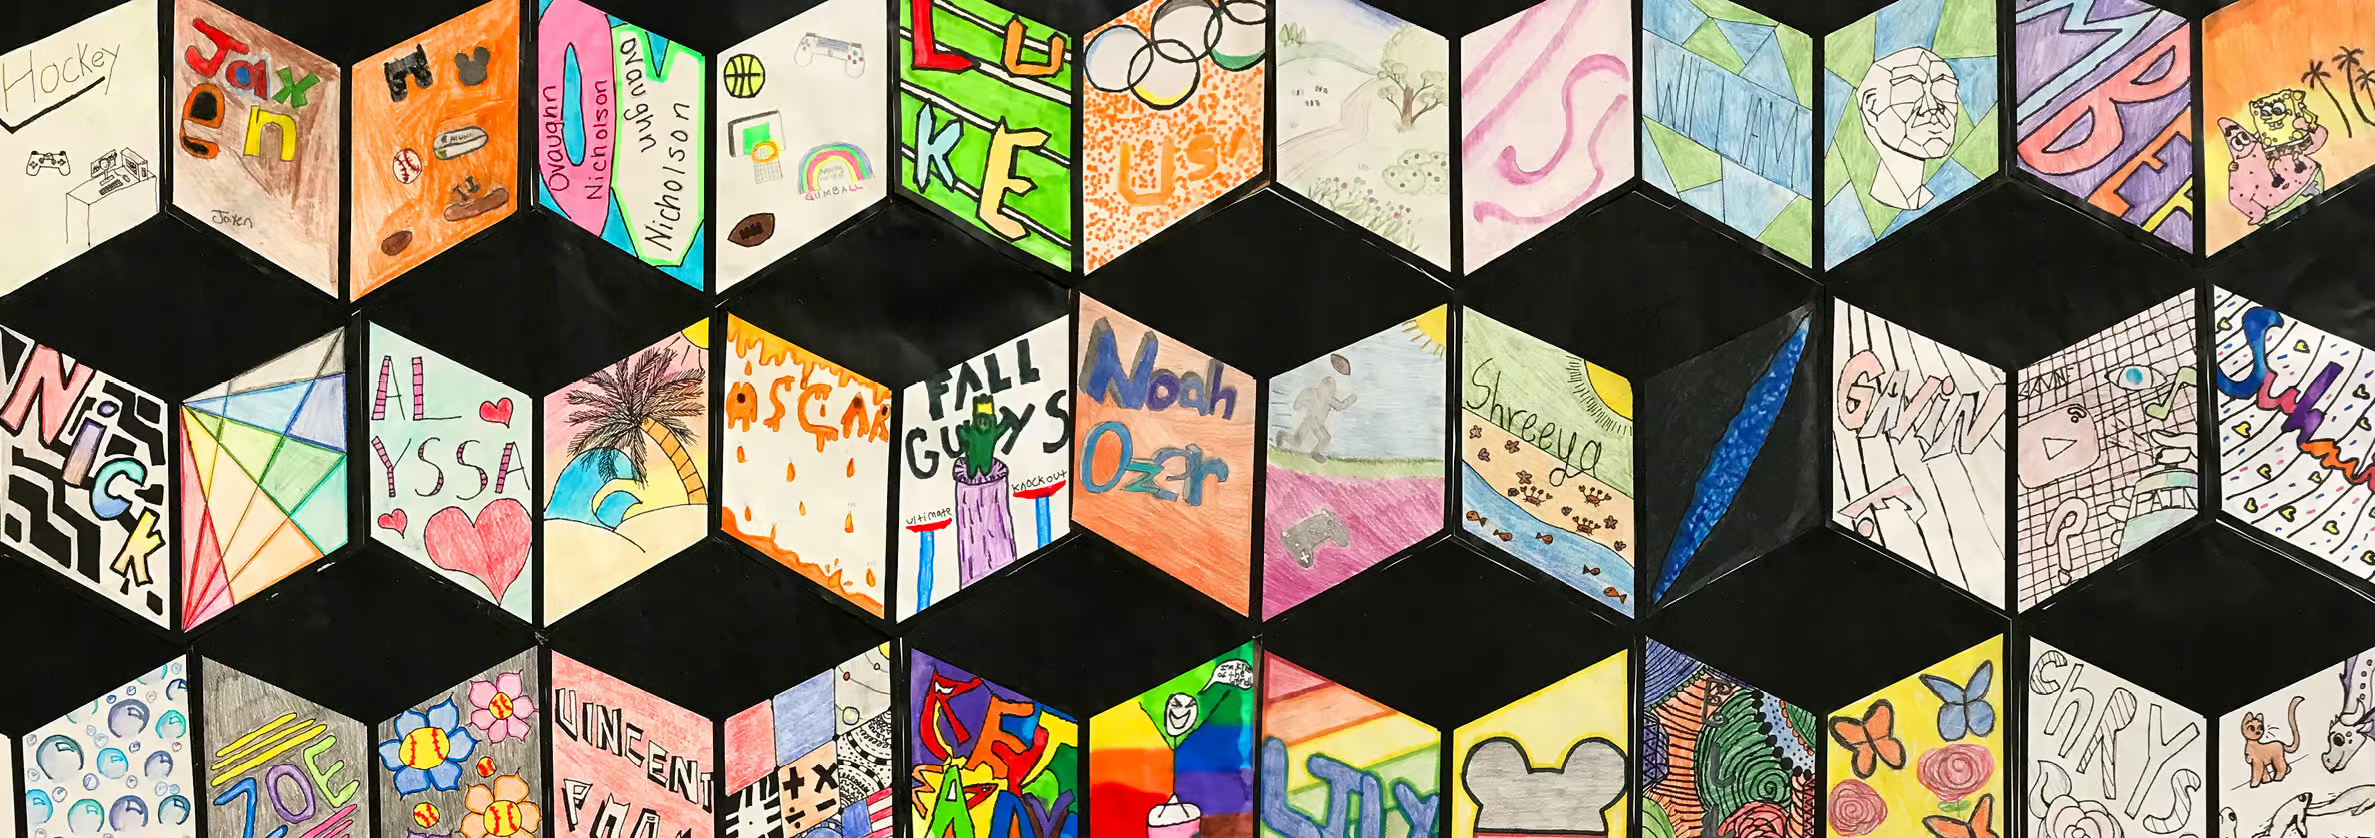
Thank YouX Collaborative Mural
I love to teach this collaborative art lesson to an entire grade level or school to create a large mural. After learning about Thank YouX and his murals, students create a piece of the collaborative mural. Students use a cube template and add a design to the two sides of the cube and leave the top black. I have students write their name in creative lettering on the left side and add one autobiographical element to the other side. In addition, the students use colored pencil to keep the artwork consistent and unified. They cut their cubes out and glue them together like a puzzle to make a very impressive mural. It is a great way to showcase all students and learn more about them!
My complete Collaborative Mural lesson plan is available here.
Exquisite Corpse
This activity is best with two or three person groups. It is a perfect activity to do before a Surrealism lesson or with a new group of students. Students fold a piece of paper in thirds and three people create a drawing of a person, animal or combination of both. The first person draws a head and neck. The neck extends past the fold to provide the next artist with a starting point. The head is folded back to hide it from the next artist. They draw a torso of an animal or person and have the hip area extend past the second fold. They fold the paper again to hide what’s been done and the third artist uses the two lines to draw legs, tentacles, mermaid tail, etc. at the bottom of the paper. The paper is returned to the original artist and they add a background and color. The results are so creative and unthinkable! Check out my YouTube video to see this in action.
Toothpick Sculptures
This works best with three or less artists to a group. Students make a series of Model Magic spheres and allow them to dry. They can make them colorful with markers if desired. Next the students create tetrahedrons, similar to pyramids. The students dip the toothpicks into liquid glue before sticking them into the spheres. They create several tetrahedrons then work together to join them with additional toothpicks and make their sculpture grow. You can make this a contest of the tallest sculpture or the most creative. The results are fun and the kids are totally engaged and working collaboratively.
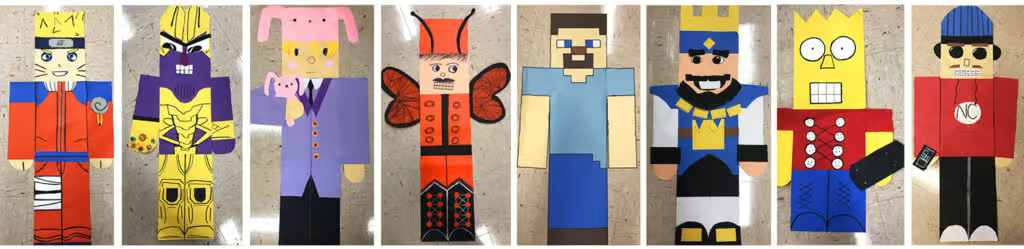
Nutcracker Collage
Your intermediate elementary and middle school students will enjoy this collaborative art project that promotes creative problem solving and team building! Students identify characteristics of a nutcracker and sketch a character of their choice applying the characteristics of a nutcracker. For example, square shoulders, straight arms and legs, boxy torso, etc. Next, they use 2 12 ” x 18” pieces of construction paper as the head, torso and legs. They use scraps, found objects and creativity to make their giant nutcracker unique and original. The finished giant nutcrackers make a perfect display for the winter months or any Holiday events happening on your campus! My Collaborative Nutcracker Lesson is available here.
Stop Motion Animation
This is a perfect partner lesson, because one student is responsible for the app, camera (phone) and the ability to take the photos while the other partner moves the objects to create the animation. Collaboratively, the students come up with a simple story line, create props and a set and take at least 300 photos to create a one minute video. I strongly suggest partners for this lesson, as a third person is often left doing nothing once the storyboard is finished. I buy popcorn and we spend a class period watching the films and the students write positive notes to their classmates.
Click here for more information about my Stop Motion Animation lesson plan.
Thanks for reading – Trista
If you liked this Collaborative Art Ideas post, please subscribe by clicking here.