Printmaking art lessons are both engaging for students and a great way to teach a variety of art techniques. Elementary printmaking may look completely different than high school printmaking, but I believe it should be introduced as early as kindergarten and experimented with throughout a child’s education. Here’s a variety of printmaking techniques you can teach your students, beginning with the most basic and increasing in difficulty.
Stamping
This is the most basic form of printmaking. This is my favorite thing to do with Kinders through 1st or 2nd grade. I show my students the joy of gadget printing in kindergarten. They use a variety of found objects, such as Lego, wooden blocks, plastic cups, forks, thread spools or anything else I can find lying around. Students dip the found objects into tempera paint and stamp the paper. They have a blast experimenting with color and shape.
Gyotaku

The Japanese art of fish printing is also a great way for beginning artists to learn about monoprints and printmaking. The rubber fish can be purchased from most art supply catalogs and can be used over and over. Students simply roll printing ink across the fish with a brayer and press on paper. I prefer to use brown paper towel that most schools supply or kraft paper that has been crumpled to soften it. I have done Gyotaku printing with kindergarten through 8th grade, all students seem to enjoy the process.
Foam Shape Prints
This is another one of my favorite lessons for younger artists learning about the printmaking process. I typically do this lesson with 2nd and 3rd grade artists. I buy a big bag of foam shapes in an assortment of sizes and shapes. The students can put the shapes together to make objects like a house, face or anything really. We use Elmer’s liquid glue and glue the pieces to chipboard or heavy tagboard. Once the glue is completely dry the students roll printing ink over the foam shapes and can make multiple prints of their design. The video below demonstrate the process while creating a radial mandala design.
Monoprints
Monoprints are a great way to teach printmaking without creating a printing plate. Students tape aluminum foil to a table surface. Then they spread ink across the surface with a brayer. Working quickly, before the ink has a chance to dry, students remove ink with Q-tips. Students press a piece of paper onto the drawing and the image is transferred from the foil to the paper. The foil can be reused and then thrown in the garbage once they are finished.
Printing Ink Foam Relief Printing Plates

This is my go to lesson for upper elementary and middle school students. I always have students create a drawing on the same size paper as the Styrofoam sheet they will be using as the printing plate. The foam sheets can be bought in 4×6, 6×9 and 9×12 sizes in art supply catalogs. Next, the student tapes the drawing to the top of the Styrofoam sheet and traces the drawing to transfer the image onto the styrofoam. Once the paper is lifted a slight impression is left and the students trace over it again using pressure. When the foam printing plate is done, apply a thin layer of ink across the surface and make multiple prints. My Foam Relief Printing Lesson is available here.

A less messy option is to create the foam printing plate as directed above and instead of using printing ink, use markers. The students add color to the foam printing plate. We then use a damp washcloth and swipe the paper in both directions (horizontal and vertical) to make the paper damp, not soaking wet. Next, place the foam plate on the paper, roll with a dry brayer and the marker will transfer from the foam to the damp paper. My students love trying new color schemes and color combinations with the same image. We have done this lesson with landscapes as the subject matter. Click here for information on my Lines Landscape Printing Lesson.
Gelli Print
I have just recently discovered Gelli plate printing and LOVE it! I have done Gelli printing with middle school students using acrylic paint. You can buy Gelli plates or make them. Once you have the printing plates they will last a long time if cared for and stored properly. My students apply a thin layer of acrylic paint with a brayer. Next you can press textures into the paint, stamp the paint or add paper shapes. Press a piece of paper onto the Gelli plate and pick up the paint that has been left behind.

Next, you can use another piece of paper to pick up the remaining paint or add another thin layer of paint and then press that paper onto the Gelli print. Another option is creating a print with positive and negative shapes. Students cover the Gelli plate with a thin layer of paint, add a stencil or cut out shapes to block the paint and press the uncovered paint onto the paper. Lastly, remove the stencil and print the remaining paint on the paper. My students layer the paint to create prints with multiple colors and layers. They have so much fun with the experimental process of these Gelli prints. Click here to check out this complete lesson.
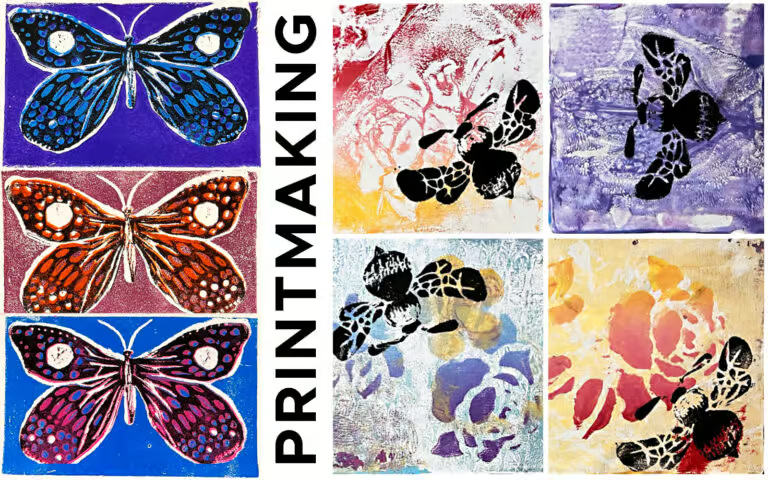
Reduction Print
Lastly, reduction prints are very rewarding and exciting, but are the most complicated to teach and create. I recommend this lesson with my 8th grade or above students. Student draw a subject on a piece of paper the same size as the foam printing plate (similar to the steps above). However with this process they start by only drawing a contour line drawing of the object. We used insects. For example, just a line drawing of a butterfly. If you want something to remain white, this should also be drawn or colored in with a pencil. Roll ink across the foam and print at least 3-4 times on different papers.
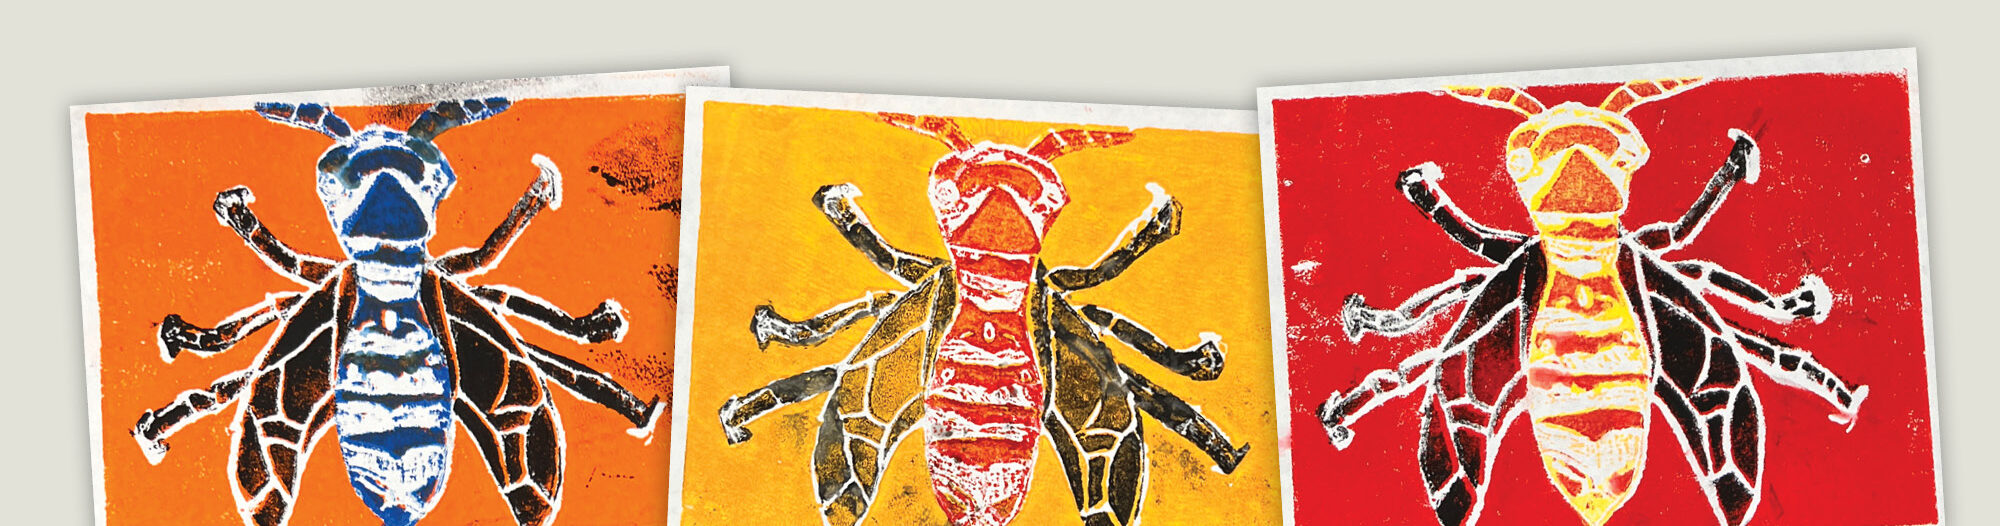
Next, they add more detail to the foam. For example, adding patterns to the butterfly. Again, keep this a line drawing not filling in the shapes. This step also requires the students to remove the background or negative space around the object. The students then roll ink across the foam shape, line up the object on the original print and print again. Now they have added a second layer and covered a lot of the first color.
Lastly, they use the pencil again and remove more foam by filling in shapes or literally cutting parts of the foam shape to keep the last color visible. We used black as the last color and found it is best to have very little foam left for this step or the overall print gets too dark. The students have to think backwards in a way, but really have fun with the process and experimentation. Here is the lesson we used.
Thanks for reading, Trista
If you liked this Printmaking Art Lessons post, please subscribe by clicking here.
Check out my How To Page for more posts like this.