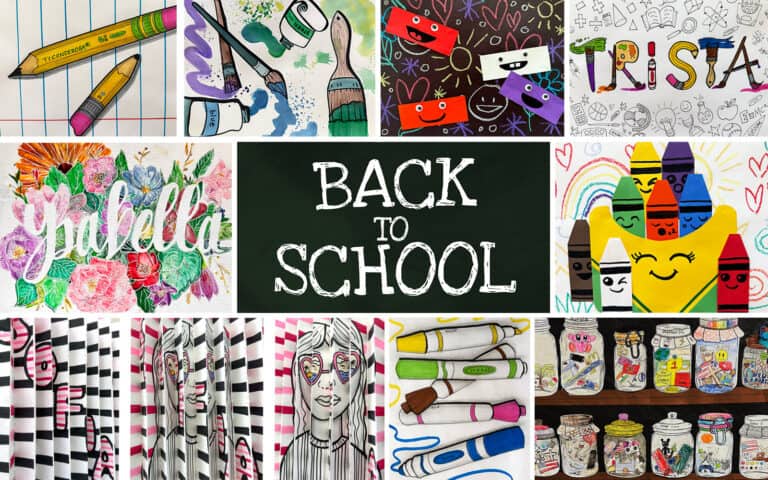
Here are some of my favorite back to school art lesson ideas for the first couple weeks of school. Elementary art lesson ideas are first, with middle school art lessons to follow. The beginning of the school year is very exciting because most of the supplies in the art room are new so I decided to make lessons that showcase all the beautiful supplies in our artwork, while we discuss the importance of taking care of them.
Chalk Monsters
This basic collage lesson is perfect for kindergarten during the first few weeks of school. Students use creativity to fill the paper with doodles and draw their favorite things. They use construction paper crayons on black paper, to create a “chalkboard” for their collage. Next, students follow guided instructions for gluing paper to the drawing. I teach my students to use a dot of glue in each corner. Then I show them how to squeeze the bottle to create small dots of glue. Students add dots of glue to the googly eyes, and we draw their mouths together. It is a perfect lesson to teach routine, following directions, and how to use glue.
Happy Crayons
This is another simple collage lesson that teaches students how to create space using overlapping objects. I demonstrate how to cut the corners of small rectangular papers to create the tip of a crayon. Next, we look at examples and draw lines and faces on each of the crayons. Students then use a template to create a box for their crayons. Then, students create a crayon drawing of their favorite things to draw. The crayon box is glued to the bottom of their crayon drawing. Dots of glue are added to the bottom of the crayons, so they can be stacked in the box to create the illusion of space. We finish the collage by adding dots of glue to the back of the crayons and crayon box.
3D Pencils
Young artists love creating optical illusions and making art that has a 3D look. In this still life drawing, students draw or trace 2-3 oversized pencils. They add details and color then outline with a Sharpie. Next, they add a simple cast shadow on the same side with a grey marker. Then, using a ruler and blue marker, they add horizontal lines using the thickness of the ruler. I will explain how to draw the line around the pencils to create the illusion of space. They use a red marker and create a vertical line to mimic notebook paper. Lastly, they use a pencil to shade both sides of the pencil and smudge with a paper towel. They are so proud and impressed with this simple drawing.
Marker Still Life
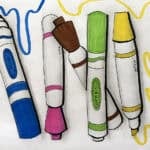
This lesson is similar to the 3D pencils. My students draw or trace 4-6 markers in different directions to create movement and overlap to create the illusion of space. After outlining the drawing with Sharpie, they use a pencil to add a cast shadow and shade on both sides of the marker. Lastly, they use markers to add color to the markers, draw lines from the markers, and add a cast shadow for each marker. The results are very impressive, and it is an easy, minimal mess lesson for the first weeks back to school.
Let’s Paint
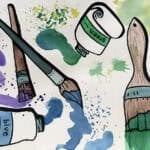
My students love painting lessons and I am willing to paint with my older students for our first art lesson because it is a great way to review painting and clean-up procedures. In this simple still life painting, my students begin drawing or tracing painting supplies. After outlining with Sharpie, students add color to the objects with watercolors. Next, students add paint spills, splatters, and paint lines in the negative space. I encourage my students to choose a simple color scheme for their painting. It is a fun way to review many procedures, while creating a simple still life using a color scheme.
Artsy Name
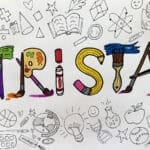
I created an Art Alphabet handout, to stick with the theme of art supplies. My students begin by lightly writing their name on a piece of paper to use as a guideline for spacing. Next, using the handout, students draw art supplies to write the letters of their name. They outline the drawing with Sharpie and erase the guidelines. They use markers to add color to the objects. Lastly, students fill the negative space with doodles within the theme of school. The doodles are done with one color to create contrast and give emphasis to the name.
All six of the lessons above are available in my Back to School Elementary Art Lessons bundle.

———————-
Back to School Art Lesson Ideas for Grades 5+
Culture Jars
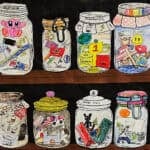
I like using this drawing lesson to create a collaborative art piece. After my students learn about the importance of cultural heritage and identity, they create a list of at least five things to symbolize who they are and what makes them special. Next, students can choose from five different jar templates. I teach my students how to draw items in their jar using overlapping to create the illusion of space. Once the drawings have been colored, students cut the jars from the paper and add a name tag to the jar with tape or paper. Lastly, I create a shelf with butcher paper and brown construction paper. The jars are glued to the paper to give the illusion of the jars on a shelf. This makes a great school display and a reminder of what makes every student special and different. My Culture Jars lesson is available here.
Agamograph
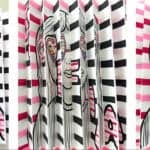
This sunglasses self-portrait and autobiographical name agamograph art lesson is a great lesson for back to school. I give students two templates for the agamograph. First, I teach them how to write their name with bubble or block letters. They fill the negative space with a pattern or a Zentangle design. Next, my students draw a simple self-portrait of them wearing sunglasses. I encourage my students to use memories from summer vacation to create a landscape in the sunglasses. Lastly, they cut the template with their name and the self-portrait into strips and glue them to a large piece of construction paper in alternating order. The construction paper is then folded like an accordion and creates an agamograph. It is such a fun way to learn the names and interests of your new students. Check out my Agamograph lesson here.
Negative Name
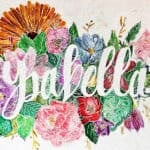
I always start with a name art lesson at the beginning of the year. In this lesson, students learn about negative space and use creative problem solving to write their name without writing their name. I encourage my students to use a creative font to lightly write their name on a piece of paper. Next, my students decide on a medium and subject matter to fill in the negative space. Some students use paint to create a geometric pattern, while others use pencil doodles to fill in all the negative spaces. The results are always very different and it’s a very helpful tool for me to remember my students names. My Negative Name lesson is available here.
Thanks for Reading! – Trista
Check out my Seasonal Lesson Ideas for more posts like this.
If you liked this post about Back to School Art Lesson Ideas, please subscribe by clicking here.
Related: Back to School Tips for Art Teachers